Showing posts with label lemon. Show all posts

Sunday, September 10, 2023

More experiments with tinned fish

I am employed again (yay!), and that means I've fallen behind on almost everything. Especially the laundry, but anyway...

I'm still experimenting with tinned fish and having a lot of fun with with it. I found this recipe searching for things to do with anchovies. Special thanks to my friend Allison for being a guinea pig. 

Our ingredient list:

  • 6 oil-packed anchovy fillets
  • 4 garlic cloves, smashed (always fun to take a mallet to something 😁)
  • ¾ cup extra-virgin olive oil
  • ½ cup walnuts
  • 3 Tbsp. double-concentrated tomato paste
  • 2 red Fresno chiles, split lengthwise, seeds removed
  • 3 Tbsp. fresh lemon juice
  • 3 oz. finely grated Parmesan, plus more for serving
  • ½ tsp. kosher salt, plus more
  • 1lb. spaghetti
  • 2 Tbsp. unsalted butter, cut into pieces

I did run into a snag when shopping: none of the places I get groceries from had Fresno chiles. I must have missed their peak season, which is a pity because I have other plans for a large amount of them.  Fortunately, I usually have a jar of Calabrian chiles in the fridge--this jar was chopped ones--so I used a heaping soupspoon full and then threw in a little more. 

Besides that, I found this was quite easy to make, which makes it good to have when company comes. You don't have to neglect them for long to cook.

Step 1
Cook anchovies, garlic, oil, and walnuts in a small saucepan over medium heat, stirring often, until walnuts are deeply golden and garlic is just beginning to turn golden, 4–5 minutes. (your kitchen is going to smell fantastic. My guest guinea pig was quite happy) Add tomato paste and cook, stirring often, until it turns a shade darker, about 2 minutes. Remove pan from heat and let cool 5 minutes.

I let it cool closer to 15 minutes. I have had the experience of having too-hot things in the blender. You do not want to know, trust me. 

Step 2
Transfer walnut mixture (including the oil) to a food processor. Add chiles, lemon juice, 3 oz. Parmesan, and ½ tsp. salt. Pulse until a thick paste forms.

Step 3
Meanwhile, cook pasta in a large pot of boiling salted water, stirring occasionally, until al dente. Drain pasta, reserving 1½ cups pasta cooking liquid.

Step 4
Scrape pesto into a large bowl and add butter, then pasta and ½ cup pasta cooking liquid. Using tongs, toss pasta vigorously, adding more pasta cooking liquid if needed (you may not need all of it), until glossy and well coated with sauce.

I didn't need any additional pasta water besides the original half cup. This emulsified beautifully. 

Step 5
Divide pasta among bowls. Season with more salt and top with Parmesan.

Optional Step 6
Do Ahead: Pesto can be made 5 days ahead. Cover and chill.

This was delicious, filling, but not too heavy, and layers of umami dancing on the tongue. I definitely will be making this again. 

If you try it, let me know!

Tuesday, May 30, 2023

Wait, I'm trendy? How did that happen?

My first exposure to anchovies was on a Domino's pizza when I was in college. I didn't care for them at all, and generally avoided them except in a Caesar salad for decades. Several years ago on a very snowy day, a friend served me a salad nicoise with anchovies I enjoyed quite a bit. This past Christmas at East Harbor Seafood Palace, (a delightful Chinese restaurant in Brooklyn), one of the dishes passed around was fried salt & pepper anchovies. These were deep fried anchovies and in the basket were some delicious salted chili pepper slices. I do plan to make salted chiles soon because how could I not?

Fast-forward a bit and I'm trying to a) live on a tighter budget than normal b) eat more fish.  I had recently become a fan of Trader Joe's smoked trout, and wanted to branch out a bit and use other types of tinned fish. So I found myself putting phrases like, "things to do with tinned fish" into search engines, not realizing just how popular tinned fish has become of late. One example is here on TikTok. 

I started with this recipe from the Food Network, and while my results weren't perfect, they were damn tasty, though this was fairly time-consuming. 

First and foremost, the artichokes went into a colander and I gave them a serious shaking and blotting with paper towels. Leaving them to drain,  I made the breadcrumbs.
  • 2 tablespoons unsalted butter
  • 2 flat anchovy fillets packed in olive oil, drained and finely chopped (this is probably not news to many of you, but chopsticks are great for getting tightly-packed anchovies out of a jar)
  • 1/4 cup panko  (I used rice cracker crumbs because my dinner guest is gluten-free. If I do this again, I will use 3 Tablespoons and use the coarsest setting on the grinder instead of a medium one)
  • Zest from 3 lemons
Put the butter and anchovies in a small nonstick pan and cook over medium-high heat, swirling the butter and stirring the anchovies until the butter starts to brown, about 3 to 4 minutes. Add the panko and cook, stirring continuously and tossing, until the breadcrumbs are golden, about 3 minutes. Transfer to a small bowl, stir in the lemon zest and set aside.  Easy peasy.

From there, I put the pasta water on to boil and while waiting for it, I grated the garlic with a microplane and chopped the anchovies for the sauce (full ingredient list below). Then I zapped the arichokes on one side in a sautée pan with 2 Tablespoons olive oil. Notes for next time include a) more draining and blotting of the artichokes and b) more olive oil. 
  • 5 tablespoons unsalted butter
  • 6 flat anchovy fillets packed in olive oil, drained and finely chopped 
  • 5 cloves garlic, finely grated 2 lemons, juiced (I also quartered a lemon to serve alongside, and I'm glad I did so)
  • Chopped flat-leaf parsley, optional
The artichokes got a bit scorched because I stepped away a little too long, so I deglazed the pan with some Pinot Grigio before I put the butter, anchovies, and garlic into the pan to complete the sauce. Once the pasta was cooked, I grabbed half a cup of the liquid (should have put in more) and threw that in the pan as well as the drained pasta.

This was rice/quinoa pasta and it soaked up that sauce like it was a premium two-ply paper towel in a television commercial, so while the flavors were there (it needed more lemon), the smooth velvety texture you get from a good emulsified sauce wasn't. I was a bit chagrined, but it still tasted pretty good, especially with extra squeezes of lemon and some red pepper, the latter of which was nowhere in the recipe.

You'll be seeing more from me with tinned fish. How do you like yours?


Thursday, June 9, 2022

Scallops and some noodling

A nice thing about cooking for one is some things suddenly become a lot more affordable. Like some seafood.

I was able to score some sea scallops (the big ones) last weekend, and what I can pay for 5 or 6 scallops is at least $10 less than having them cooked for me in a restaurant, so there's a major win right there

Scallops are easy to cook. Medium heat until the butter or oil (I usually use olive oil). I find that 90 seconds a side will give me a nice sear, but still leave the inside deliciously tender. The short cooking time is also helpful for people who can't stand too long. Which leads me into the noodling.

I really should have been, and I am very sorry I did not, over the last decade plus of this blog, taken accessibility in the kitchen into consideration as a default mode. This came to my attention when a friend posted this article (shared with her from Terri Lynne Hudson) on social media and I ask that you please read and share it. Minced Words looks like it's going to be a regular column and I will be signal boosting and referencing.

Many people love Alton Brown and one of his fans' favorite things to quote is his strong dislike of the unitaskers in the kitchen, unless it's a fire extinguisher. He has a point, if you're able-bodied. Nobody should be shamed for using something that makes it possible for you to do something that you couldn't otherwise. So the hell with that nonsense. 

Think about this: how many things do you use in your kitchen that you take for granted that can be helpful to a disabled person? Things to open jars comes to mind first--things that help you grip are a life saver for someone with arthritis. Silicone rings on your mixing bowls to keep them from slipping. 

Most recipes out there don't take such things into consideration as what you might be able to lift, how long you can stand, what you can grip. Bad on all of us recipe bloggers out there. We can do better. 

We also need to stop shaming people for buying ingredients that might be pre-peeled or pre-cut or in jars. Using those things doesn't make anyone less of a cook. 

I need to do some more research regarding where I can do better here. I will try to mention what tools I'm using and what might be helpful for someone with disabilities and limitations. If you have ideas, comments are welcome.

......................

Back to the scallops, if that isn't too jarring a segue, because I did want to share this with you.


The plan was scallops over a bed of arugula with a sauce of white wine, butter, and lemon. Side of quinoa with Parmesan and pepper. For the sauce:

  • 1 Tablespoon of salted butter
  • Juice of 1/2 a lemon, which is about 2 Tablespoons
  • 1 Cup of white wine, this was sauvignon blanc, which I've been drinking a lot of lately. Actually, I'm drinking white wine spritzers. The 1980's are coming back to haunt me. 
  • A few grinds of black pepper (or shakes, depending on what you have)
  • 1 Tablespoon of capers, drained and rinsed. I use a teacup that came with its own mesh strainer to drain and rinse capers. 

I melted the butter on low heat, then slowly stirred in the wine and the lemon, letting it simmer while I made some quinoa (half a Cup, dry) in the rice cooker, which is my current favorite convenience tool. When the quinoa was almost ready, I brought the heat up to medium high until it boiled, then dropped the heat to low so I could reduce it some more. It tasted nicely tart.

For serving, I put a handful of arugula on a plate, then when the quinoa was finished I stirred in some a Tablespoon of butter, 3/4 of a cup of Parmesan. It stayed warm in the rice cooker's bowl while I zapped the scallops. 

Once I plated the scallops, I put the capers in the sauce and added it. It didn't quite reduce as much as I wanted. It was a bit too tart at first, but as it ran all over the plate and into the quinoa, something interesting happened. The saltiness from the cheese seeped into the sauce and about halfway through the meal, everything together on the fork was a perfect mouthful.

Maybe a little less lemon next time anyway.

Monday, August 31, 2020

Two-for-one special or Kate makes Greek-inspired recipes

Some people go down YouTube bunny trails and suddenly find that they've lost a few hours. I'm more likely to do that with my favorite fictional universe's wiki ('favorite' here meaning 'whatever I'm consuming at the time'), and I'm also highly likely to do this when looking for recipes.

The last time I did this, I found a recipe for avgolemono, a soup I've seen on many a Greek menu, but never tried. For some reason, this weekend seemed to be the perfect time to try it, and this recipe worked like a charm. It was easy, and tasty, and felt nourishing even as it felt light.

Ingredients
  • 7 cups chicken stock (I used store-bought, 4 cups low-sodium, 3 cups regular. I am considering switching out a small amount for some vegetable broth for a bit more depth, not more than a Cup, more likely half of one. Alternately, I could make my own stock again. As soon as I have room to store it. Ha! #studioliving)
  • 1 cup orzo pasta
  • 3 eggs
  • Juice of 1 large lemon (this worked out to about 1/4 Cup)
  • Salt and ground black pepper
  • Lemon slices, to garnish

  • In a large pot, bring the stock to a boil. Add the orzo and cook for five minutes. Turn off the heat. (if you have an electric stove, also move it to another burner).
  • In a medium bowl, beat the eggs until frothy, then add the lemon juice and one tablespoon of cold water. 
  • Very slowly stir in a ladleful of the hot chicken stock, then add one or two more. With the heat still off, add the egg mixture to the pot and stir well. 
  • Season with salt and pepper and serve immediately, garnished with lemon slices and fresh herbs
I was nervous that the stock was still going to be so hot it cooked the eggs when I added the first ladleful, so I gently shook the ladle over the egg mixture with one hand and kept stirring with the other. This seems to have done the trick. I hadn't grabbed fresh herbs when I went out to get lemons, so I kept it simple and added some dried parsley.


It was delicious and I managed to keep myself from eating it all. I did have a couple accompaniments. Half a pita and some hummus and a red pepper/feta dip.  (note: I used a food processor)

I'd made the dip before following a recipe that I didn't bookmark, but I wanted to play around a little. I'm only going to be able to give you approximations for starting. This is a taste you want to customize. 

  • 6 ounces feta cheese, crumbled
  • approx 8 ounces roasted red peppers from a jar
  • 1 Tablespoon lemon juice
  • 1/4 cup Calabrian chiles  in oil (also from a jar). I didn't drain, de-seed, or de-rib them.
  • 1/2 teaspoon of dried oregano (which totally got lost)

Put everything into the mixer's bowl. Mix/blend until the color is consistent. Add peppers in small amounts until you achieve the balance of flavors you like. Service with pita or pita chips, and sliced cucumbers. A few olives on the side aren't bad either.

A couple notes:

If you don't have the chilis in oil, add 1 Tablespoon of olive oil. If you're using a stand blender, I recommend putting the peppers in first so the cheese doesn't all clump around the bottom and clog the blades. I'd also advise using the pulse function and scraping the sides often. I didn't get a picture of the dip, but I'll be making it again soon, I'm sure. Maybe I'll make hummus again too, it's been a while.


Monday, March 16, 2020

Since I'm staying home, I'm cooking. Arthichoke and Spinach Pasta

Hi everyone,

It's been a while yes. Many things have happened since I last post. Let me explain. No, that would take too long, let me sum up. My apartment building was purchased and nobody's lease was renewed, so after an exhausting search complicated by issues at work, I grabbed an apartment not far from the United Nations. One of its attractions is there was enough room in the kitchen to handle all my stuff.

Then there was losing the old job (long store, this isn't the place), the stress of finding a new one. Fortunately, I managed to do both of those in the same month, so things could have been a lot worse. The  new place is fabulous.

And now, social distancing due to Covid 19. I'm an introvert most of the time, so being by myself or working from home isn't a hardship. It's also an opportunity.

When I went to the store recently, they were out of meat except for chicken wings and sausage. There was plenty of cheese and vegetables, though, so here's three of my lunches for this week.

Ingredients for 1 pound of pasta:

Pasta Sauce 

  • 6 cloves of garlic (alternately, roast a bulb)
  • 1.5 cups of minced onion, or a combination of onion and shallot
  • 1 14-ounce can of artichoke hearts in water
  • 5 oz of spinach
  • 4 oz of whipped cream cheese
  • 2 cups of milk
  • 5 oz fresh spinach
  • 6-8 ounches Parmesan or Grana Padano cheese, grated
  • 1/4 teaspoon of salt (eliminate if you're using salted butter)
  • 1 teaspoon Herbs de Provence 
  • zest of one lemon
  • 1/4 teaspoon of black pepper (optional)
  • 2 Tablespoons butter
Warm Tomato Salad (side dish)
  • 1/2 to 3/4 Cup grape or cherry tomatoes per person
  • Olive oil to coat (spray is also good here)
  • Salt
  • Balsamic vinegar to taste

Drain the artichokes well, then chop them half-inch bits or run them through the electric toy of your choice. Put back in the colander and smush the water out of them. Set aside

Melt the butter on low heat in a sauté pan. Add the raw chopped garlic (if you roasted it, add it after the cream cheese is melted), onions (and shallots if using) and cook, stirring constantly until the onions are translucent. This may take longer than you think, but the idea is to have them mostly melt into the sauce. Low and slow is the way to go here.

Add the cream cheese and let it sit in the pan for a few minutes before it starts to melt. This will be a touch annoying since, but it's mitigated by using the whipped cream cheese instead of a block. Slowly stir in 1 Cup of the milk until everything is of the same consistency.

Add the artichokes, the lemon zest, the herbs, and the salt & pepper. Stir until everything is combined. Slowly add the grated cheese. Taste to see if you'd like more pepper or herbal flavor and adjust accordingly. 

Let simmer. Stir occasionally while you do the below

Side dish time: This sauce is an awful lot of richness, so I put a side together with acid to cut that, and it's pretty easy. Turn the oven on to 425 F. 

Cut your tomatoes in half and arrange them in a glass baking dish. Sprinkle with salt and pepper. If you have an olive oil spray, spritz them a couple times and toss in the dish to ensure they're oiled all over. If not, start with 1 Tablespoon of olive oil, and stir. Put in the oven,, uncovered, set your timer for 25 minutes.

Back to the sauce. Stir in the other cup of milk until it is incorporated fully. Add your spinach a handful at a time. Once all the spinach has been added, start your pasta water and cook your pasta according to your taste and/or package directions.

I used baby spinach and it took a while to completely wilt and get fully engaged in being part of the sauce. After the timer goes off on the tomatoes, check them. You should be able to smell them, and they should look a little dried and wrinkly. If they still look like you just cut them, put them back in the oven and check them every 5-8 minutes.

When your pasta is ready, drain well and slowly stir into the sauce. Let simmer while you put the tomatoes on a plate and put a little balamic vinegar on them.

Season to taste while eating with black pepper. Or red pepper, if you'd like a little bite.

I only used 8 ounces of pasta so I could play later. After I put aside two dishes' worth for lunches later this week, I still had sauce left over. Plans for this include a package of mushrooms and possibly a quarter pound of pancetta. 

Enjoy!


Friday, May 11, 2012

Help! I sound like a magazine!

As I mentioned in my last entry, we just moved. While we're mostly unpacked, it took a while to get everything into the kitchen, so I have not done as much cooking as I would have liked. I did marinate a flank steak in ancho chile powder and garlic with a little vinegar recently, but I wasn't thrilled with the result. My sweetie really enjoyed it, so it may have simply been to subtle. My dear Nexx never smoked and has much more sensitive taste buds than I. As for myself, I thought it needed more acid and salt. On the bright side, I was able to get a very nice texture on a less expensive cut of meat. When I've improved the recipe, I'll post it here.


I was a little worried a few years ago when I moved to Connecticut. I spent my teenage years in an affluent suburb of Massachusetts and I used to joke that the town was as pretty as a postcard and had about as much depth. Okay, I wasn't really joking.  Anyway, I was concerned that Connecticut would be similar, that I was going to be living the life I had spent the last twenty years running away from.


I needn't have worried. Despite the stories of yuppies and preppies and whatever the current abbreviations are (they used to call my kind of household DINKS, double-income, no kinds), Connecticut has pockets of character. And in Stamford, we have some ass-kicking pizza.


Where the magazine comment came in is when we had some leftover Remo's pizza the other night. When we went out for the original dinner we had some fresh (!) bread with olive oil as well as some fresh sliced mozzarella for an appetizer. We went home with half a personal pie each. I knew half the pie wouldn't be sufficient, and I'm still having a hard time chewing salad, so I found myself "jazzing up" our dinner of leftovers with some roasted cauliflower. I thought of making the balsamic version I did some time back, but then I found this recipe and said, "Hmmmm."


Our ingredients:


  • 1 lemon
  • 1 large head cauliflower, trimmed and cut into bite-size florets
  • 2 tablespoons extra-virgin olive oil
  • 1/4 teaspoon salt
  • 1/4 teaspoon freshly ground pepper
  • 1/2 cup finely shredded Parmesan cheese, plus more for garnish (I used grana padano, which is a little more complex than parmesan and quite delicious)
  • 2 tablespoons capers, rinsed

Besides the cauliflower, which you want fresh anyway, I'm happy to say I had all the other ingredients in the house as a matter of habit. The grana padano was a money-saving effort because imported parmesan is getting ridiculous in price.

The instructions were very easy to follow:

  1. Position rack in lower third of oven; preheat to 450°F. Coat a large rimmed baking sheet with cooking spray.  
  2. With a sharp knife, remove skin and white pith from lemon and discard. Working over a small bowl, cut the lemon segments from their surrounding membranes, letting the segments drop into the bowl. Drain the juice from the segments.
  3. Toss the lemon segments, cauliflower, oil, salt and pepper on the baking sheet and spread evenly. Roast until starting to soften and brown, stirring once halfway through, 25 to 30 minutes.
  4. Sprinkle Parmesan and capers over the cauliflower; stir to combine. Serve garnished with more Parmesan, if desired.
................................

I always appreciate a recipe that tells me where to put the oven rack. It can make such a huge difference and this is not a lesson you want to learn the hard way

When a recipe says "sharp knife," take it seriously. I was able to get out the lemon segments without mangling them too much, which is a big change from my first attempt and supreming an orange. I opted  not to drain the juice. Since the capers were to be rinsed, I thought the extra bite from the citrus would be nice. I probably also went a little overboard on the black pepper. I blame Nana, and damn do I miss  her.

I loved the results. The recipe says this makes 4 servings. It made two from a small head of cauliflower. Lemon and capers work pretty well together. Capers you can almost consider the poor person's truffle. Added correctly, in a small amount, they can really class up a dish. And unlike truffles or truffle oil, capers are within Joe or Jeanne Average's budget.

With spring being upon us (though the temperature in Stamford has yet to hit 70), you'd think I'd be going more for fresh vegetation. Unfortunately, I still have that bite plate in my mouth to go wtih the braces. Chewing raw veggies, especially cruciferous (I may not have spelled that correctly) is still difficult.  I have until next April and then one of my first meals is going to be corn on the cob.

Coming soon--a different kind of fish coating. Stay tuned!

Saturday, May 28, 2011

Scarborough Fair Part One--Rosemary Scones

Before I get into today's entry, I thought I'd give you a quick preview of what's coming up in future entries. If you recognize the song title above, you'll have correctly inferred there will by thyme (potato salad), parsely (linguine with clams) and sage (I have no flipping idea) coming up in the next several weeks. We'll also have a treat in which I will play photojournalist and take pics of my sweetie as he creates a creme brulee or two.

Today's dessert intrigued me and it's all my friend Mike's fault. Mike lives in Athens, Georgia, which is towards the northeast part of the state. It is home to UGA and some of the most fabulous food I've had. We went to a restaurant called the Farm, who grow as much as they serve as possible and source the rest locally. I remember an omelette with lemon-infused tomatoes that still makes my mouth water, and for dessert, we had an olive oil-rosemary pound cake. It was my first foray into combining a normally savory spice into something sweet and I was hooked.

Like most Americans, we'll be at a cookout on Memorial Day--does anyone do parades and read "In Flander's Field" anymore? We were asked to bring a salad, and then also dessert. The salad will be, I hope, a replica of one I had in a restaurant/club a couple weeks ago. Avocados and black pepper are involved, but I'll save the rest for the upcoming posts. After driving myself nuts about dessert, Ken said he'd make the creme brulee, but I kept browsing for desserts that didn't involve an ice cream maker.

Today's recipe comes from Giada De Laurentis of the Food Network. I like this recipe and the layout because it was accurate with the timing, and had some good hints about what the mix should look like before adding liquid. I also appreciated that it did not insist on a food processor--anyone with a fork can cut butter into dry ingredients, it just takes a little longer. Anyway, copyright is Food Network, if they're paying attention. Here's our ingredient list:

2 cups all-purpose flour, plus more for dusting
1/2 cup sugar
2 teaspoons baking powder
1 tablespoon finely chopped rosemary leaves
1/4 teaspoon fine sea salt
6 tablespoons unsalted butter cut into small pieces (I was really tempted to switch out a tablespoon or two for olive oil. Maybe next time)
1 cup heavy cream
1/3 cup strawberry jam
1/4 cup fresh lemon juice
2 cups confectioner's sugar

I really love my half-moon chopper for cutting up herbs. I also saved myself a little time by cutting off a lot of the rosemary with scissors. My fingers still smelled like the fragrant herb, but I can deal with that.


For the scones: Place an oven rack in the middle of the oven. Preheat the oven to 375 degrees F. Line a baking sheet with asilpat or parchment paper. Set aside. (I used aluminum foil lightly greased with olive oil. I don't know where my parchment paper is)
In the bowl of a food processor, pulse together the flour, sugar, baking powder, rosemary, salt, and butter until the mixture resembles a coarse meal. (I used the cook's note below) Transfer the mixture to a medium bowl. Gradually stir in the cream until the mixture forms a dough.
 On a lightly floured work surface, roll out the dough into a 1/2-inch thick, 10-inch circle.
I ran into a small problem here. I don't own a rolling pin. I don't do an awful lot of baking, so it's never come up as a need. Instead, I used an iced-tea glass that came from Tea Forte (delicious stuff, but I digress, and they're not paying me to endorse)


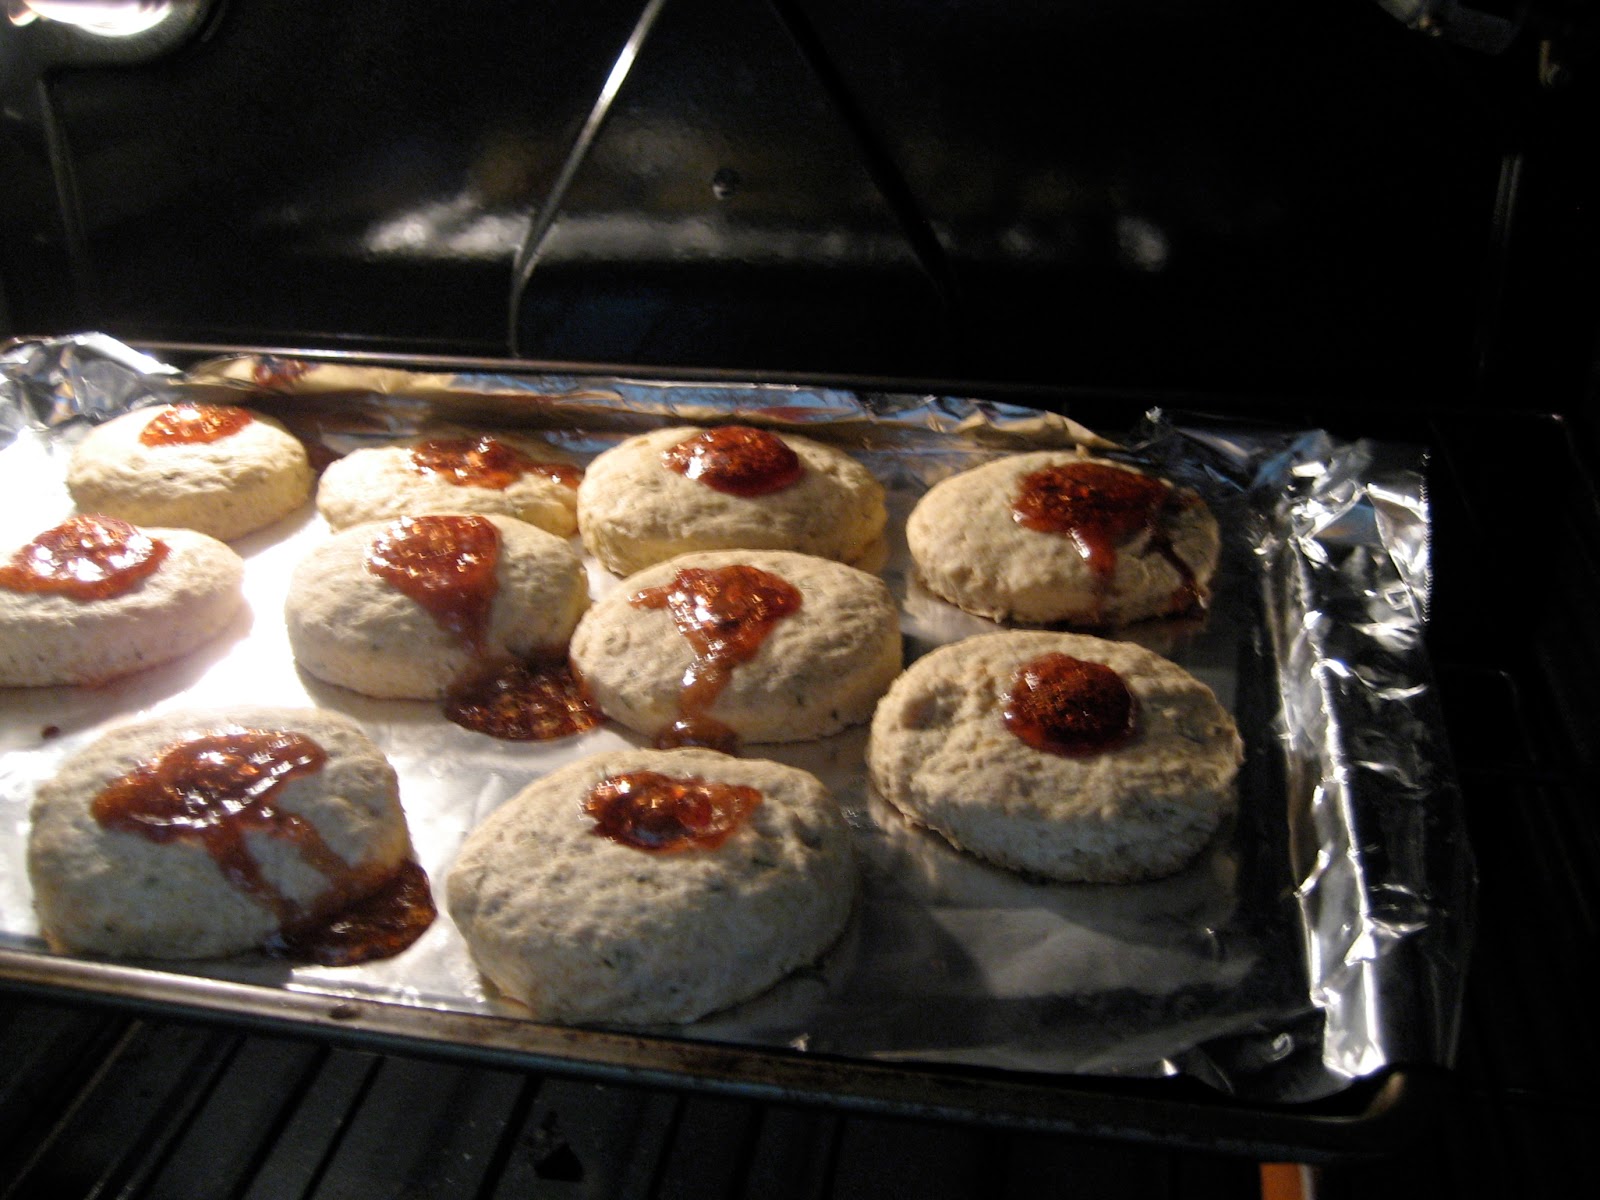
 Using a 3-inch heart-shaped cookie cutter, cut out heart-shaped pieces of dough and put on the prepared baking sheet. (I used a round juice glass, though at the end, I rather liked the lumpy hand-shaped one. I may go with that the next time) Gently kneadtogether any leftover pieces of dough and roll out to 1/2-inch thick. Cut the dough into more heart shapes and add to the baking sheet. Using an index finger or a small, round measuring spoon, gently make an indentation in the center of each pastry heart. Spoon a heaped 1/2 teaspoon of jam into each indentation. Bake for 18 to 20 minutes or until the edges are golden brown. Transfer the cooked scones onto a wire rack and cool for 30 minutes.

For the glaze: In a medium bowl, mix together the lemon juice and powdered sugar until smooth. Gradually add the water until the mixture is thin enough to spread. Using a spoon, drizzle the glaze over the scones. Let the glaze set for about 30 minutes. Serve or store in an airtight plastic container for 2 days.
I had a bit of a problem with the glaze. I don't know if I made it too thin or if 30 minutes wasn't enough time, but it just ran right off the scones, leaving only a taste behind. Didn't take away from the deliciousness, though.
Cook's Note: The dough can also be made by hand by stirring together the flour, sugar, baking powder,rosemary, and salt in a large mixing bowl. Add the butter. Using your fingertips or a pastry blender, work the butter into the flour until the mixture resembles a coarse meal. Gradually stir in the cream until the mixture forms a dough.

Overall, I was really pleased with the results. They're not too sweet, the lemon in the glaze is a nice finishing touch and I find them good for breakfast or dessert. The finished product: